Sunday, October 31, 2010

Meet Jennifer of Hummingbird Traveler Studio!

We're big fans of Jennifer Primeaux and are so excited to share a bit about her with you today! From fanciful cotton batting flower girls to handsome mice dressed in their finest royal attire, her work combines Victorian era details, Native American inspiration and the best of 18th century France.  With meticulous attention to detail and a flawless execution, we're sure you'll become big fans too!  Read on for a peek into Jennifer's world... 

A bit about you (name, location, where you can be found on Etsy & online).
Jennifer M. Primeaux of the Hummingbird Traveler Studio. Santa Fe, NM. www.etsy.com/shop/hummingbirdtraveler
 

How did you get involved in your crafting business?
I have been crafting and drawing since I was two. As a toddler I would get fists of crayons and draw on the walls; when I got in trouble with that I started drawing in the closets. Growing up we made many of our own Christmas ornaments and decorations. When I graduated from high school I knew I wanted to be an artist, or maybe an art historian. The preservation of Native American cultures has always been a love of mine. From high school I went to the Institute of American Indian Art, and after that I went to The University of Oklahoma for Art History. I didn't think of starting my own crafting business until the late 90's when I found myself working at a holiday shop. To say that I was enchanted by the Victorian (inspired) and German glass ornaments that I sold is an understatement. It was love at first sight! Within a couple of months of working there, I started making my own Victorian Christmas ornaments. Initially, it's still a dream of mine, I wanted to have my own line of Native American glass ornaments. Unfortunately, this is too expensive to do by myself. Those early years were spent experimenting with making my own molds (for candy containers), learning the art of spun cotton, experimenting with collage techniques and research. Since then, I have been creating my own version of the Victorian ornament. I discovered Etsy a few years ago. I see Etsy as great opportunity to showcase my ornaments. 


Describe your signature style.
My ornaments are a combination of the Victorian ornament made from cotton batting, and a three dimensional doll. Each ornament has a doll body on the inside made from cotton batting, cotton fill and wire. There is a lot of hand sewing in each one. Also, I create my own patterns for each. When I can, I try to use vintage supplies in my ornaments. Anything magical like fairies, Marie Antoinette, Native American cultures and the little critters in my yard are all inspirations for me. I love to take my inspirations and sprinkle them with glitter!


How has your approach to design changed over the years?
I don't know. It feels like it hasn't changed. 


What are your favorite materials? Any tools or supplies you can't live with out?
My favorite material right now is millinery flowers, cotton batting, vintage seam binding, and glitter. At the moment I'm in love with this vintage 1950's thread holder that I have. Its a pink plastic doll with a bell skirt. Inside of her bell skirt is a place for your threads. Otherwise, I can't live without all of my flowers, ribbons and papers!


Biggest design or crafting challenge so far.
I think the single biggest problem I have now is how to make my ornaments more quickly! Each ornament still takes hours to make.


Who or what has/have been your creative influences?
I come from a family of crafters and artists. My primary influence is a my Mother, Connie Hansen. She is a fine arts painter and has always encouraged me to create. When I was a kid she always found money to buy me pads of drawing paper and colored pencils, paints, etc. Other influences are my Native American ancestry, The Victorian Era, the 1920's-30's, and Marie Antoinette. Also, I love animals. When I look at the little animals in my yard I picture them wearing little outfits and having personalities.


Favorite color combinations?
I really like faded colors, especially light pinks and blues. Anything aged is great. When I buy vintage millinery I don't mind if they have brown spots on them, this gives them character.


Interest outside of work/design?
I'm really interested in History. My boyfriend always laughs at the documentaries I watch. He thinks they are really boring. Maybe they are, but I think they are fascinating! I'm also in love with Victorian architecture, I spend a lot my time looking at old houses for sale. I feel like a displaced Victorian.


Anything else you'd like people to know about your pieces?
Behind each completed design there were at least 20 prototypes that didn't make the cut. I'm very particular about my work. It has to meet a certain standard, and most importantly they have to possess a certain magic or I don't sell it. It doesn't matter how long I have spent on it. An example would be the German style candy containers I tried to make (Native American designs). I spent about five thousand dollars on them and I could never get them to work (problems with the medium). When you get one of my ornaments you are getting something that is truly handmade.

***********

Thank you, Jennifer! :)

Saturday, October 30, 2010

A Morning Visitor

 The other morning I pulled the curtains back, surprised to be greeted by none other than Thomas perched on top of the porch.  Usually he's fearful of heights and wants help back to ground level, but not this day.

 He was content to hang on with his tail, listen to the birds and take in the elements.

 Eventually I retreated to make tea and breakfast, leaving my favorite visitor to greet the day in his own way.

Wednesday, October 27, 2010

Fall Decorating: Cone Cornucopias

One of my absolute favorite things in our shop is the millinery.  I love sorting it, photographing it and, of course, doing things with it.  Above are a couple of my top picks -- a spray of autumn colored maple leaves, vintage white cherries and vintage button mushrooms.  They mixed in perfectly with other seasonal fruits and leaves to top off a few handmade paper cones.


Much like the treat buckets, we used pretty Italian papers, ribbons and Dresden trims to create these cones.  Plus a scrap of a girl holding a cornucopia.  I'm very into the large turkey Dresdens -- we just got them in today so they'll be in the shop and on the website first thing tomorrow.


We made each cone unique but kept it pretty cohesive color-wise.  Left to right we have a velvet leaf/nut and vintage exotic fruit cone, an autumn floral cone with both vintage and contemporary flowers and, last but not least, a fruit cone with all vintage Japanese and German berries, fruits and chili.


Have you started thinking Thanksgiving crafting? Or is Thanksgiving more of a cooking holiday for you? It's definitely a time for baking around here.  And for... mmm... turkey sandwiches!

Monday, October 25, 2010

A Completed Putz Church

Busy times around here now, especially since Christmas is two months from today.  Seems like it sneaks up faster and faster every year! Here's how the little church from the previous post turned out.  We're also introducing a new cottage this year:

Is it starting to feel like the holidays for you yet? I know it's early but I'm thinking about putting my tree up soon :)

Friday, October 22, 2010

In the Workshop: More Putz Houses


Been working on more putz houses this week and thought you'd enjoy a peek at how the design process starts out.  That little church above is just a few inches tall -- have to gauge the proportions before it becomes full size.  I'll show you how it turns out next week, so until then, happy weekend!

Thursday, October 21, 2010

New Yard Project: More Patio

I've tried to resist doing two yard project posts in a row, but I'm too excited not to today! Yesterday we had a brief break in the rain -- just long enough for the sun to come out, dry things a bit and let me snap a few pictures.  This was before all the edge stones had been cut so you can see a few bare areas above.  I'm still mystified that one asymmetrical shape can fit together like this:

See the urn at the end of the wall? That's been sitting there empty for a while, but now happily has a foxtail palm in it.  The foxtail had been in the ground but, being a palm that's a bit finicky and needs extra TLC, wasn't performing too well.  They thrive in pots and like wet soil, so it'll be much easier to care for now.  It's also going to cast pretty shadows on the patio in the summer months.

It's another rainy day today so we're on hold again.  We still need to sweep sand into the joints and stomp around to encourage it to compact down.  It's amazing how much sand it takes, usually more than you think.  After sand sweeping our next phase is the lawn area.  There are several weeds to pull and a whole lot of leveling and smoothing in the near future.

Tuesday, October 19, 2010

New Yard Project: Patio Progress!

The middle of last week was dedicated to moving the patio forward in several huge steps.  After spending several hours leveling our area, we spread gravel from the brickyard, leveled it as best we could and began tamping it down by hand.  Not pleased with the results, we ended up renting a power tamper that worked like a charm -- as it vibrates itself forward, it totally compacts the gravel.  See it above and how large its plate is compared with the hand tamper next to it? Here's a close up view of its handiwork:

With the area tamped and level, it was time to spread sand.  After a trip to the local brickyard for two scoops of masonry sand, we were ready to start distribution.  One of my jobs was to climb in the truck and push the sand toward the back for easy shoveling:

Spreading it was super satisfying! We could really see the patio shaping up quickly and felt like we were making major progress:

Once the sand was distributed everywhere we gave it a pass over with the power tamper:

Next up came the fun part: paver placement.  Can you believe I made six trips to Home Depot in two days to pick up loads of pavers? We chose a faux flagstone in a terracotta hue to tie in with the saltillo tiles on our porch.  These are a uniform shape that interlock and go down super easily.  It's amazing how one shape can fit together so well.

We got the majority of them placed just before a rain storm moved in.  Unfortunately, when I had a chance to take a picture it was already pouring, and hasn't let up for more than a few soggy minutes since then.  So... more photos coming soon, weather permitting :) I'm excited to show you how it looks!

Thursday, October 14, 2010

New Special Edition German Scraps

 We've just added several new styles of scraps to our website and etsy shop that are part of a special edition reprinting of images from the 1950s.  The scraps above are not part of this reprinting but are a new addition to our shops.  We love the image of the girl catching stars and couldn't resist sharing it with you!

 The group above can be found here, here and here.  Most of the images from this limited edition feature charming scenes of children and their pets.

Other images feature children in traditional German outfits, costumes and Victorian wear.  You'll find this group here, here, and here.

This is just a small sampling of some of our favorites -- we're stocking even more than what you see here!

Tuesday, October 12, 2010

Cityscapes

Sometimes I'm guilty of taking photos then leaving them in the camera for ages.  Today I discovered this group from a visit north to the city a few weeks ago.

Being up several floors in a semi-old building gave a great view of other buildings.  I remember being quite taken with some of the intricacies of the older structures.

See the empty streets?  We were up there pretty early in the morning.  On our way out mid-day the streets were a buzz with both cars and pedestrians.

Saturday, October 9, 2010

Christmas Gift Idea: Mixing Painting & Embroidery

Do you love to embroider? Do you love to paint? Well, then I've got a project for you! How about mixing the two to create pretty linens for someone special? These pack quite a visual punch and are sure to wow even your most hard-to-impress gift recipients this year.


You'll need fabric paint, brushes made specifically for painting on fabric (they have very stiff bristles and let you really push the paint into the fabric with a lot of control), embroidery floss and a needle, a transfer pencil, a design and fabric to put your design on (muslin, linen, and cotton work wonderfully).


When choosing your design, keep in mind that simple turns out just as lovely as something complex.  Color-wise, we like to stick with just a few paint colors and then embroider around them in a darker version of the same color -- it really makes the design stand out like in the leaves, petals, pollen and stems above.  Try using DMC's glossy rayon embroidery floss instead of the standard matte variety to add dimension and luxuriousness.


As far as choosing your fabric, we've found that Osnaburg muslin handles beautifully and has a great texture.  Linen is wonderful for achieving an heirloom-quality look and creating fringed edges, like in the runner above. Which ever fabric you choose, make sure to shrink it first and sew it into your desired shape -- it's much easier to align and transfer your design to a finished piece then to try sewing it after you've painted and embroidered.


If you have a stash of pretty laces, try incorporating some of them into your piece.  We used a crochet lace border, a swath of muslin and careful stitching to create the large, one of a kind doily below.


Because the lace makes such a strong statement, we went with a simpler design in just green so as not to overwhelm the eye.


The blanket stitch running along the edge is more than decorative - it also helps to secure the border in place.


While we clearly have a thing for table runners, this technique can be used on all kinds of linens... a set of pillow cases or napkins, hand towels, even pillow covers.  Most of the supplies you need are available at Michael's or Jo-Ann, and design inspiration is everywhere.

Happy weekend everyone! And happy crafting!

Wednesday, October 6, 2010

New Yard Project Part 4: The Blue Wall

Next on our yard to-do list is choosing a striking wall color. We're inspired by the above photo of a blue stucco wall somewhere in the Yucatan. A bold color sure makes the palms pop! And it's almost the exact same color as the sky. Below is our wall and a few color chips. The idea is to make our palms pop, too, with the vines creating an undersea kelp effect.

What do you think? Do any of these blues look like the "the one"? After a while, they all start to look really similar.

So far we're partial to the above chip, second from the bottom.

Tuesday, October 5, 2010

An Everlasting Topiary of Flowers

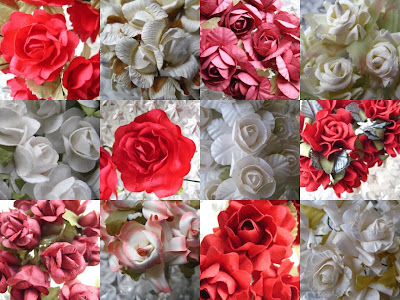
We absolutely love seeing how you use our supplies, so we were overjoyed when Stephanie shared the above photo with us. She used a mix of paper roses in different styles and textures to create a stunning topiary ball. Below is a closeup of the mix she chose -- red, white, ivory, dusty rose, gorgeous!